"How To" Projects That Make Home Life Easier, Better, or Safer

Clean a Bare Cedar Wood Deck
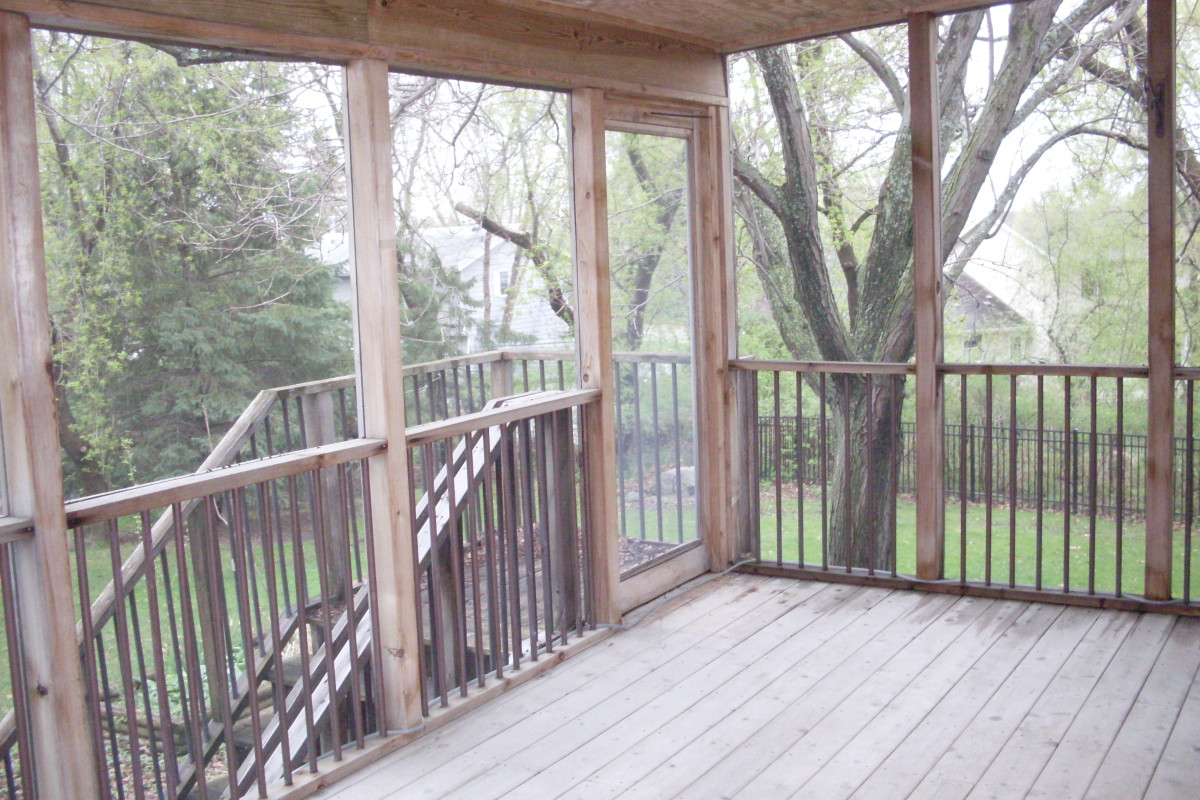
How to Clean a Bare, Unfinished Cedar Wood Deck
Difficulty of this project: Easy
Time to complete this project: Under an hour, depending on the size and dirtiness of the deck
Cost: Under $1 for dish soap; $10 for a deck brush if you don't have one
How can you clean your deck effectively without harsh chemicals that can harm kids, pets, or plants? Use dish soap! This method works well with unfinished cedar wood decks and even siding (test on an inconspicuous spot first, however).
Simply mix up a bucket of soapy water, brush it lightly on your deck, let it soak for about 15 minutes, then brush lightly and rinse off with a hose. If some areas are still dirty, spot-treat those areas, letting the soapy water soak for another 15 minutes on the area and brushing more vigorously as-needed. Very little brushing/work is necessary with this method, however, compared with commercial cleaners and regardless of how dirty your deck is with moss and dust/dirt.
Tips:
- Make sure the soapy water doesn't dry out while you're waiting for it to work--a cloudy day is best for this. You can also mist the area with the hose or apply more soapy water from your bucket if areas begin to dry before they have had a chance to soak for 15 minutes.
- Use dish soap with enzymes and "oxy", such as Dawn liquid dish soap, for best results.
- If you have a large deck, clean just a portion at a time to make sure the soapy water doesn't dry on the surface before you have a chance to rinse it off.
- While you're waiting for the deck to soak, use the soapy water to clean the deck furniture using a large sponge or scrub brush. Be sure to hose off the dirty soapy water before it dries on the furniture, however!
- Never use a pressure washer on wood--it ruins the wood's surface! Just regular hose pressure and possibly a little brushing is all you need to rinse away the grime.
For complete instructions, see "Clean a Bare, Unfinished Cedar Wood Deck With Dish Soap".
A Complete Garage Door Monitor System

Remotely Make Sure Your Garage/Shed Door is Closed
Difficulty of this project: Easy
Time to complete this project: About Half an Hour
Cost: $15-20
If you have a garage or shed with a roll-up or fold-up door, you can remotely make sure that the door is closed without leaving your home or bed! Simply install a sensor on the door and a receiver in a central location inside your house, such as your bedroom, and the receiver lights will tell you at a glance if the door is open or closed.
This remote monitoring system works with attached or detached (within range of the sensor/receiver) garages and sheds whose doors roll or fold up. No more worrying if there is an intruder in your garage, stealing something or breaking into your house, and no more need to get up in the middle of the night to check on the door, and no more worrying if the kids remembered to close the door when they finished playing.
For installation details and more information, see "How to Remotely Make Sure Your Garage or Shed Door is Closed".
Custom Ironing Board Form

How to Iron Clothes Faster
Difficulty of this project: Somewhat involved.
Time to complete this project: About an hour.
Cost: $5-15, assuming you have most of the tools needed.
Cut your ironing time significantly by making a simple, custom ironing board to tackle a bunch of your clothes. A custom ironing board saves you time and you'll always look great in pressed clothes.
Pick your most tedious, time-consuming set of clothes to iron--such as T-shirts--and gather representative samples of them to establish the pattern (size and shape) of your custom ironing board. Draw a pattern, then cut out a thin board that is the shape of that pattern using a jigsaw. Cover the wood on both sides with quilt batting, cut to size and stapled in place. Then, cut out a cover from two pieces of plain, un-dyed cotton cloth and sew both sides together, leaving room to slip it over the wooden/batting form. Hand-sew the opening closed once the cover is on the wooden form.
Tips:
- Make sure to pre-wash the cotton cloth cover to remove the sizing.
- Sew a sturdy ribbon or cord on the top of the form so that you can hang it up in your laundry area.
For complete instructions and more information, see, "Iron Faster: Make A Custom Ironing Board Shape".
Opt Out of Junk Mail
How to Opt-Out of Most Junk Mail
Difficulty of this project: Easy.
Time to complete this project: Half an hour.
Cost: Free-$5.
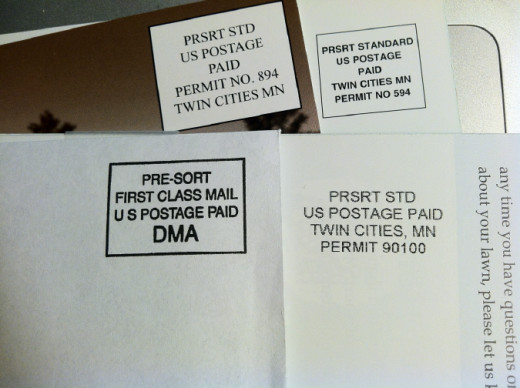
Have you ever wished you could get rid of junk mail before it even arrives in your mailbox? The good news is that in most cases you CAN! Getting rid of junk mail "before it happens" helps protect your privacy, too, and saves you time shredding unwanted credit card offers, for example, and other offers containing personal information that you would rather keep private.
Several simple steps will significantly reduce your unwanted mail in just a few few weeks.
- Opt-out of unsolicited credit offers by contacting the credit bureaus.
- Ensure that the Department of Motor Vehicles is not selling your contact information to mass marketers.
- Contact the Direct Marketer's Association and get removed from their mailing lists.
By "opting-out" of junk mail sources, you are helping to keep waste out of landfills as well as protecting your privacy and helping to prevent identity theft and fraud.
Tip: There are even services you can subscribe to that will help keep your mailbox slim and trim and junk-mail free.
For complete instructions and more information, see, "In Pursuit of Privacy: How to "Opt Out" (Part 1)" and "In Pursuit of Privacy: How to "Opt Out" (Part 2)".
Are You a DIYer?
Do you consider yourself a do-it-yourselfer?
Will you try any of these "how-to" projects around your home?
For More Reading...
- Get a Stuck Ring Off of Your Finger -- No Cutting
To remove a stuck ring, all you need is a helper and some dental floss (preferably waxed). Wind up the dental floss then unwind it pulling the ring along for the ride. Easy! No cutting required! - How to Put On Jewelry Without Help
Have you ever had trouble putting on a bracelet or other piece of jewelry? Here are three tricks that might help you. - Keep Jewelry Untangled and Ready-to-Wear
How to store jewelry safely, tangle-free, and tarnish-free. Also, right-size and rotate your jewelry collection for variety. And, make sure your jewelry box(es) are big enough to hold your jewelry. - Keep Cheap, Fake, or Costume Jewelry from Tarnishing or Turning Color
How to keep inexpensive jewelry from leaving green or black tarnish marks on your skin. Works for most costume jewelry, fashion jewelry, fake jewelry, wholesale fashion jewelry, and so on.
About the Author
Information about the author, a list of her complete works on HubPages, and a means of contacting her are available over on ==>Laura Schneider's profile page. But wait--please leave ratings and any comments you have about this article so that it can be improved to best meet your needs. Thank you!
All text, photos, videos, and graphics in this document are Copyright © 2013 Laura D. Schneider unless indicated otherwise or unless in the public domain. All rights reserved. All trademarks and service marks are the property of their respective owners.


